解析 Supermap Rest 根目录
从 Supermap Rest 服务的根目录出发,第一步是请求 CatalogList。返回的结构大致是这样子的:
 1
 2
 3
 4
 5
 6
 7
 8
 9
10
11
12
13
14
15
16
17
18
| [
{
"resourceConfigID": "maps",
"supportedMediaTypes": [
"application/xml",
"text/xml",
"application/json",
"application/fastjson",
"application/rjson",
"text/html",
...
],
"path": "http://192.168.31.4:8090/iserver/services/map-China/rest/maps",
"name": "maps",
"resourceType": "CatalogList"
},
...
]
|
我们需要里面的 "path",去请求一个 CatalogList,可以取出对应的 "name",让用户自己去选择请求哪个 CatalogList。
一个简单的 SupermapRestClient 实现:
 1
 2
 3
 4
 5
 6
 7
 8
 9
10
11
12
13
14
15
16
17
18
19
20
21
22
| export class SupermapRestClient {
private _url: string;
constructor(url: string) {
this._url = url;
}
async doRequest() {
const resource = new Cesium.Resource(this._url + ".json");
const json = await resource.fetchJson();
const resourceList: { name: string; client: SupermapCatalogListClient }[] = [];
for (const item of json) {
if (item.resourceType === "CatalogList") {
resourceList.push({
name: item.name,
client: new SupermapCatalogListClient(item.path)
});
}
}
return resourceList;
}
}
|
其中的 SupermapCatalogListClient 在下一小节实现。
获取 CatalogList
现在假如用户已经选择需要请求的 CatalogList,再来看以一下 CatalogList 的结构:
 1
 2
 3
 4
 5
 6
 7
 8
 9
10
11
12
13
14
15
16
17
18
| [
{
"resourceConfigID": "map",
"supportedMediaTypes": [
"application/xml",
"text/xml",
"application/json",
"application/fastjson",
"application/rjson",
"text/html",
...
],
"path": "http://192.168.31.4:8090/iserver/services/map-China/rest/maps/China",
"name": "China",
"resourceType": "StaticResource"
},
...
]
|
同理,取出 "path" 和 "name",一个简单的 SupermapCatalogListClient 实现:
 1
 2
 3
 4
 5
 6
 7
 8
 9
10
11
12
13
14
15
16
17
18
19
20
21
22
| export class SupermapCatalogListClient {
private _url: string;
constructor(url: string) {
this._url = url;
}
async doRequest() {
const resource = new Cesium.Resource(this._url + ".json");
const json = await resource.fetchJson();
const resourceList: { name: string; client: SupermapRestStaticResourceClient }[] = [];
for (const item of json) {
if (item.resourceType === "StaticResource") {
resourceList.push({
name: item.name,
client: new SupermapRestStaticResourceClient(item.path)
});
}
}
return resourceList;
}
}
|
其中的 SupermapRestStaticResourceClient 在下一小节实现。
获取 StaticResource
获取 Capabilities
在很多地图协议中,地图的 metadata 一般也叫做 Capabilities, StaticResource 请求的就是地图的 metadata,所以一个简单的 SupermapRestStaticResourceClient 实现:
 1
 2
 3
 4
 5
 6
 7
 8
 9
10
11
12
| export class SupermapRestStaticResourceClient {
private _url: string;
constructor(url: string) {
this._url = url;
}
async getCapabilities() {
const jsonResource = new Cesium.Resource(this._url + ".json");
return await jsonResource.fetchJson();
}
}
|
这个返回的 json 里面有很多信息,但是没有我们最需要的地图瓦片地址,先忽略它,之后再来看。
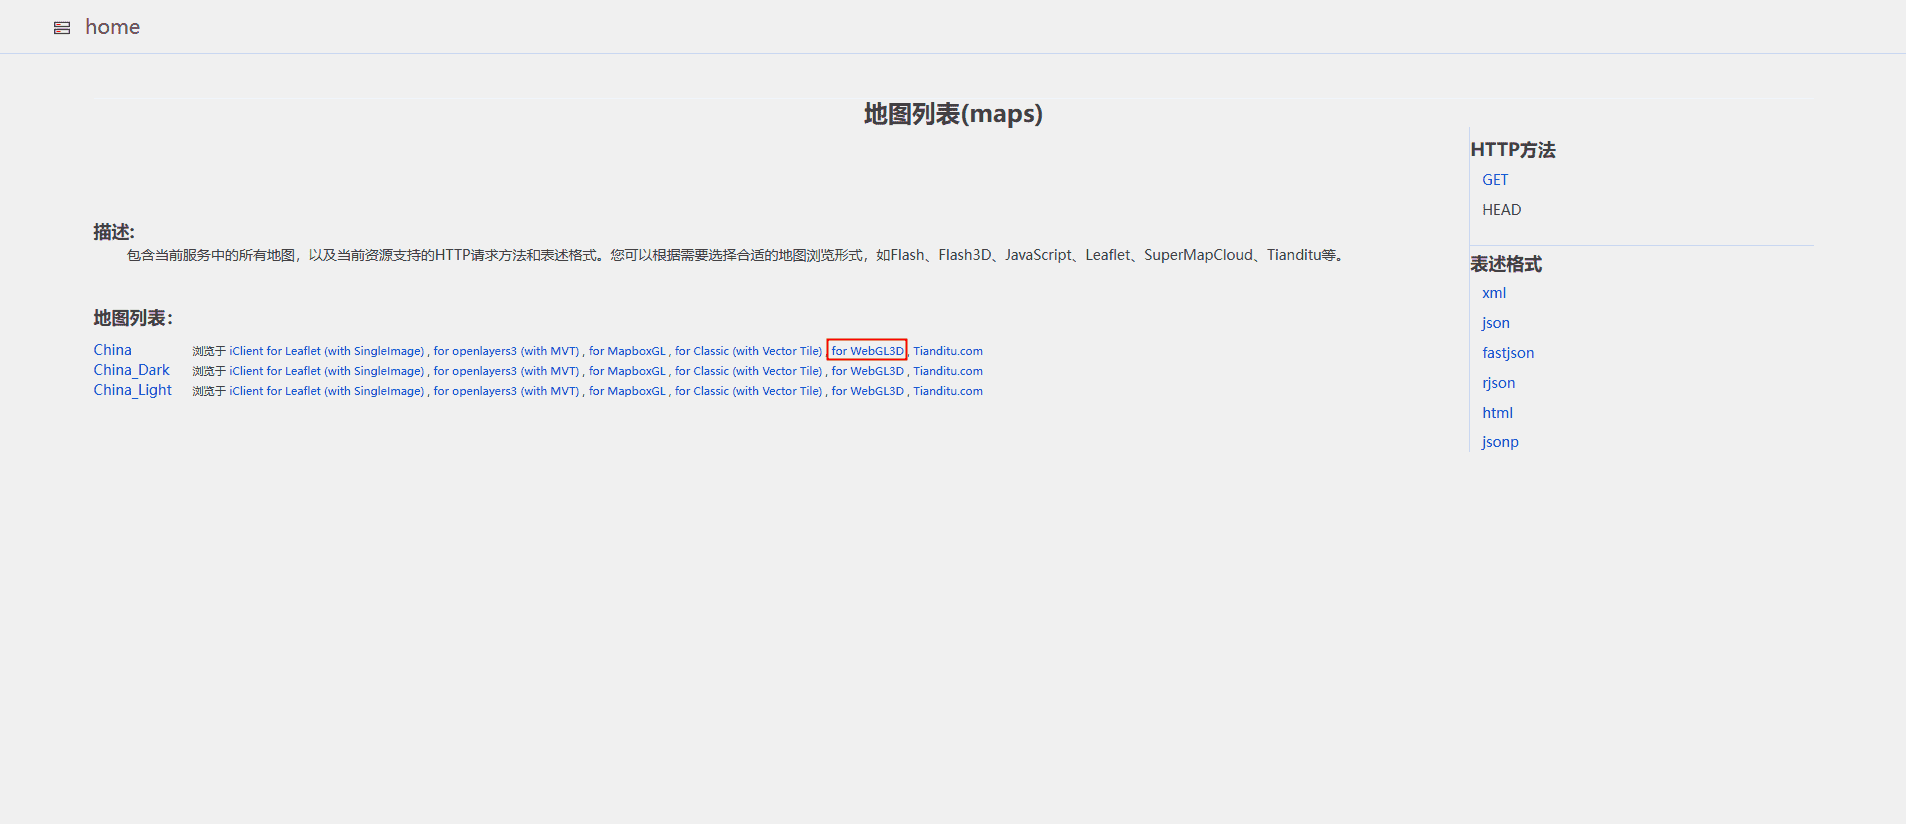
获取地图瓦片
打开 iServer 的 Rest 服务地图列表界面,可以看到有一些可以预览效果的链接。
通过查看网络请求,可以找到地图瓦片请求,显示最后请求的是一个 tileImage.png 的图片:
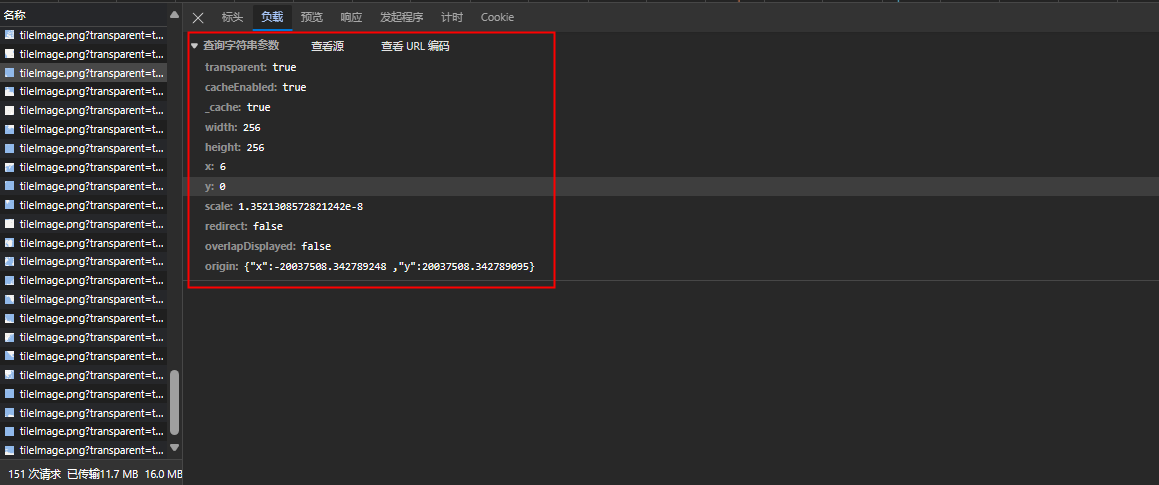
以此,可以为 SupermapRestStaticResourceClient 添加一个新的方法来构造这个请求:
 1
 2
 3
 4
 5
 6
 7
 8
 9
10
11
12
13
14
15
16
17
18
19
20
21
22
23
24
25
26
27
28
29
30
31
| export class SupermapRestStaticResourceClient {
...
getTileImageResource(tilingScheme: Cesium.TilingScheme) {
let originX: number;
let originY: number;
if (tilingScheme instanceof Cesium.WebMercatorTilingScheme) {
originX = -20037508.342787;
originY = 20037508.342787;
} else {
originX = -180;
originY = 90;
}
const tileImageResource = new Cesium.Resource(this._url + "/tileImage.png");
tileImageResource.appendQueryParameters({
transparent: true,
cacheEnabled: true,
width: 256,
height: 256,
redirect: false,
overlapDisplayed: false,
origin: `{x:${originX},y:${originY}}`,
x: "{x}",
y: "{y}",
scale: "{scale}"
});
return tileImageResource;
}
}
|
其中,origin 需要根据不同的投影坐标系或者地理坐标系进行修改,x, y, scale 这三个参数交给 Cesium 去填写。
x 和 y 很好理解,就是水平和垂直方向上的瓦片坐标,但是 scale 是什么。
计算 scale
在 Supermap 的文档中,可以找到相关的描述:scale
$$
scale = \frac{1}{Resolution \frac{PPI}{0.0254}}
$$- Resolution 代表每一个像素有多少实际距离
- PPI 代表了每一英尺有多少个像素,这个数值一般为
96 - 0.0254 是英尺和米的转换比例
以 WebMercator 为例,它的第 0 级瓦片整张地图实际大小为 40075016.68×40075016.68 米左右,假如向 Supermap 发起一个 256×256 像素大小的图片请求,那么:
$$
\begin{aligned}
\cr
Resolution &= \frac{40075016.68}{256} = 156543.03\cr
scale &= \frac{1}{156543.03 \frac{96}{0.0254}} = 1.6901635718379278e-9
\end{aligned}
$$以此类推,我们可以计算出 WGS84 和 WebMercator 各个级别下的 scale 值,并用一个数组来表示:
 1
 2
 3
 4
 5
 6
 7
 8
 9
10
11
12
13
14
| const WGS84Scales = [
3.38032714321e-9, 6.76065428641e-9, 1.352130857282e-8, 2.704261714564e-8, 5.408523429128e-8, 1.0817046858257e-7,
2.1634093716514e-7, 4.3268187433028e-7, 8.6536374866056e-7, 1.73072749732112e-6, 3.46145499464224e-6,
6.92290998928448e-6, 1.3845819978568952e-5, 2.7691639957137904e-5, 5.538327991427581e-5, 1.1076655982855162e-4,
2.2153311965710323e-4, 4.4306623931420646e-4, 8.861324786284129e-4, 0.0017722649572568258, 0.0035445299145136517,
0.007089059829027303
];
const WebmercatorScales = [
1.6901635716e-9, 3.38032714321e-9, 6.76065428641e-9, 1.352130857282e-8, 2.704261714564e-8, 5.408523429128e-8,
1.0817046858257e-7, 2.1634093716514e-7, 4.3268187433028e-7, 8.6536374866056e-7, 1.73072749732112e-6,
3.46145499464224e-6, 6.92290998928448e-6, 1.3845819978568952e-5, 2.7691639957137904e-5, 5.538327991427581e-5,
1.1076655982855162e-4, 2.2153311965710323e-4, 4.4306623931420646e-4, 8.861324786284129e-4, 0.0017722649572568258,
0.0035445299145136517, 0.007089059829027303
];
|
获取 Rectangle 和 TilingScheme
Rectangle 就是 Cesium 里面的经纬度范围,TilingScheme 就是 Cesium 里面的投影坐标系和地理坐标系。
这些信息被记录在一开始我们请求的 Capabilities 里面。
为 SupermapRestStaticResourceClient 添加一个新的方法:
 1
 2
 3
 4
 5
 6
 7
 8
 9
10
11
12
13
14
15
16
17
18
19
20
21
22
23
24
25
26
27
28
29
30
31
32
| export class SupermapRestStaticResourceClient {
...
getTilingSchemeFromCapabilities(capabilities: any) {
let tilingScheme: Cesium.TilingScheme;
if (capabilities.prjCoordSys.epsgCode === 4326) {
const rectangle = new Cesium.Rectangle(
capabilities.bounds.left,
capabilities.bounds.bottom,
capabilities.bounds.right,
capabilities.bounds.top
);
tilingScheme = new Cesium.GeographicTilingScheme({
numberOfLevelZeroTilesX: 2,
numberOfLevelZeroTilesY: 1,
rectangle
});
} else if (capabilities.prjCoordSys.epsgCode === 3857) {
const southwest = new Cesium.Cartesian2(capabilities.bounds.left, capabilities.bounds.bottom);
const northeast = new Cesium.Cartesian2(capabilities.bounds.right, capabilities.bounds.top);
tilingScheme = new Cesium.WebMercatorTilingScheme({
numberOfLevelZeroTilesX: 1,
numberOfLevelZeroTilesY: 1,
rectangleSouthwestInMeters: southwest,
rectangleNortheastInMeters: northeast
});
} else {
throw new Error(`espsgCode ${capabilities.prjCoordSys.epsgCode} is not supported.`);
}
return tilingScheme;
}
}
|
构造 SupermapRestImageryProvider
最后使用 SupermapRestStaticResourceClient 去构造一个 SupermapRestImageryProvider,它继承自 Cesium.UrlTemplateImageryProvider:
 1
 2
 3
 4
 5
 6
 7
 8
 9
10
11
12
13
14
15
16
17
18
19
20
21
22
23
24
25
26
27
| export class SupermapRestImageryProvider extends Cesium.UrlTemplateImageryProvider {
private constructor(options: Cesium.UrlTemplateImageryProvider.ConstructorOptions) {
super(options);
}
static async fromSupermapRestStaticResourceClient(client: SupermapRestStaticResourceClient) {
const capabilities = await client.getCapabilities();
const tilingScheme = client.getTilingSchemeFromCapabilities(capabilities);
const tileImageResource = client.getTileImageResource(tilingScheme);
return new SupermapRestImageryProvider({
url: tileImageResource,
tilingScheme,
customTags: {
scale: function (_imageryProvider: Cesium.UrlTemplateImageryProvider, _x: number, _y: number, level: number) {
if (tilingScheme instanceof Cesium.WebMercatorTilingScheme) {
return WebmercatorScales[level];
} else {
return WGS84Scales[level];
}
}
}
});
}
}
|
其中,使用了 customTags 功能,因为 scale 不是 Cesium.UrlTemplateImageryProvider 默认有的参数,需要我们自定义一个函数返回在不同 level 下的 scale 值。
代码调用流程
最后,演示如何去使用上面编写的方法。
请求 CatalogList
1
2
3
4
5
6
7
| const url = "你的 Supermap Rest 地址";
// 创建 SupermapRestClient
const client = new SupermapRestClient(url);
// 请求 CatalogList。
const catalogList = await client.doRequest();
|
等待用户选择哪一个 CatalogList。
请求 StaticResource
1
2
3
4
5
6
7
8
| // 假设用户选择了第一个
const selectId = 0;
// 获取用户选择的 CatalogListClient
const catalogListClient: SupermapCatalogListClient = catalogList[selectId].client;
// 请求 StaticResource
const staticResourceList = await catalogListClient.doRequest();
|
等待用户选择哪一个 StaticResource。
添加 ImageryProvider
 1
 2
 3
 4
 5
 6
 7
 8
 9
10
11
| // 假设用户选择了第一个
const selectId = 0;
// 获取用户选择的 StaticResourceClient
const staticResourceClient: SupermapRestStaticResourceClient = staticResourceList[selectId].client;
// 创建 ImageryProvider
const provider = await SupermapRestImageryProvider.fromSupermapRestStaticResourceClient(staticResourceClient);
// 添加 ImageryProvider
viewer.imageryLayers.addImageryProvider(provider);
|
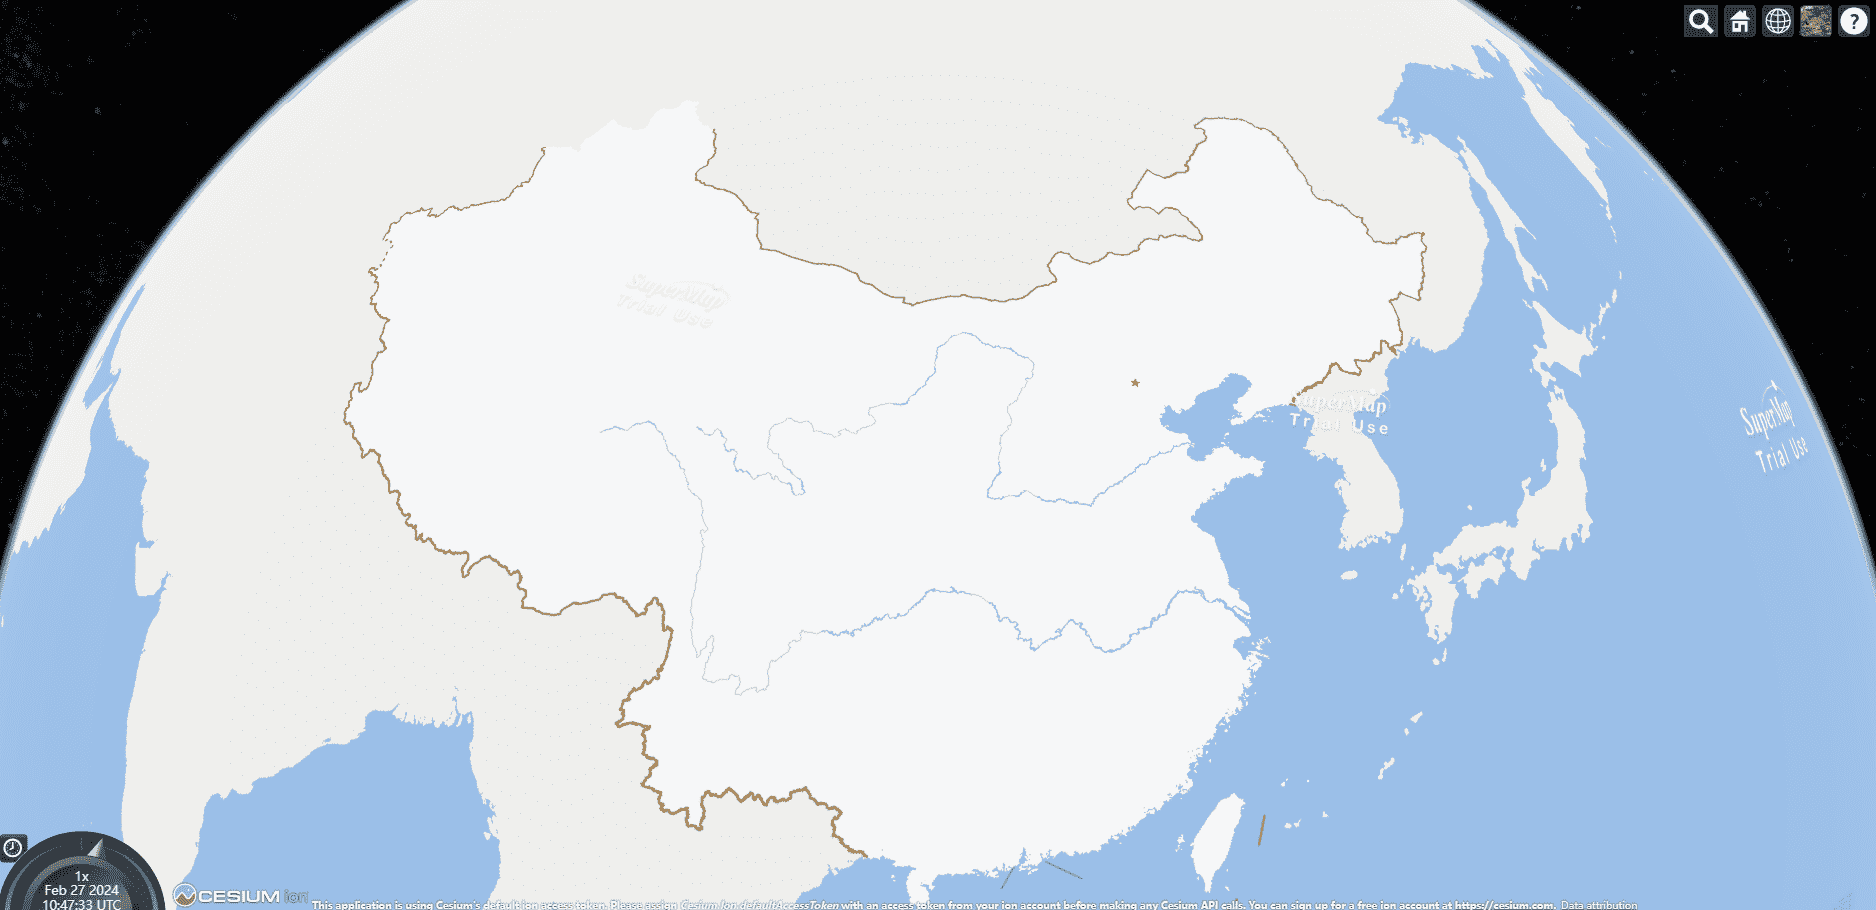
完整代码&效果图
完整代码:cesium-supermap-rest-imagery-provider
参考资料
